Tuesday, September 30, 2008

34 Years Ago TODAY!


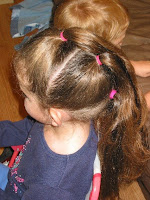
Yep, today is my birthday (my 36th). So I thought it would be fun to post a few pictures of me getting my hair done for my 2nd birthday party (which was 34 years ago).


Does anyone still have one of these cool old hair dryers???


And, drum roll......the final do:


Sunday, September 28, 2008

Cork Screws to Half Pony


This one is probably easy enough that you don't need an explanation. But real quick:

I started out not sure of what I was going to do (as I often do). I divided the front part of the hair into three sections.
Then I just separated out a square section on each side at the front. Pull the rest back into a tight, tangle-free half (or whole) pony.
I made two ponies with elastic out of the squared-off sections. As you can probably see, I "flipped" them (pulled the pony through underneath) before starting the cork screw.
Once you finish the first cork screw, clippy it to the back while you do the second one. I always twist further than necessary in case a little bit of it comes unraveled while I'm doing the final pony.
At the very end I pull both cork screws into a tight half pony in the back. Then from that pony you can do anything you want--a messy bun, a braid, several braids, etc. I took just a little bit of hair from that pony and made another larger cork screw down the back and added some ribbon.

Voila! You're done. I'll show pictures of this same type of "do" done in several different ways in the next week or two. For example, you can do several corkscrews into ponies and weave them, chain-link them, etc. This particular one (into one half pony) is a great quicky style but can look very pretty at the same time.

Don't know how to make a cork screw? Never fear, over at Story of a Princess and her Hair has a grew short video showing you how to do it HERE. She calls it a twist braid, some call it a cork screw--either way, it's the same twisty concept. Enjoy!

Thursday, September 25, 2008

Current Girl Hair Giveaways

I want to make sure my "girl hair" visitors know about two cool giveaways going on.

First, Emmers at Rockin' Shorty Hairstyles is giving away some bows made by Heavenly Homemades. Check out what she's offering HERE.

Second, Devri over at Hair's Our Life is giving away (1st) a set of Conair heated hair setters and (2nd) FIVE (that 5) custom made bows. If you haven't yet met Devri, be sure to go visit her HERE.

UPDATE: Okay, Devri left a comment today about sending the most guests to her giveaway. So if you haven't already entered, be sure to enter the giveaways and tell them that Miller Manes sent you! As a girl hair blogger, I could win something too. Woohoo! Go, go, go!!!!

Wednesday, September 24, 2008

Upside-down Braids to Bun


I wanted to do something elegant, but not with tons of elastic showing. So we did these upside down french braids all around her head that came to a central spot at the top of her head. It's a simple concept, actually. Here's one way to do it:

First, wet, wet, wet hair and make sure it's free of tangles. Next, divide the hair into 6 even sections. I did two in front, two in the middle, and two in the back.
Next, she laid down on the couch and I braided her hair starting in the back. I french braided from her neck up to the center of her head and then regular braided all the way to the ends of her hair. Just continue to move around the head until you've finished all 6 section.
As you can see, they all end at one central location.
At this point you can do just about anything with the remaining hair. You can ponytail it and undo the remaining braids, out of the pony you can do double twists or other tiny braids, you can just messy bun it, you can combine the braids all into one big braid or weave the braids all the way around in a cool pattern, etc. The sky's the limit. I just ponied all the braids and turned it into one big bun using bobby pins to hide the ends of hair. And since I don't have one of those cool fancy pony-o's (or "thingies" as Jamie calls them), I used a boring adult scrunchie.


One thing I WISH I had tried was knotting each braid and undoing a couple inches of free hair at the ends and curling it. I may re-try this one in a couple weeks and do just that so that we can all see how it turns out.

And here's a fun collage for all of our family (great grandparents, grandparents, aunts, uncles, cousins, and extended cousins) who are ALL long, long distance. (you can click the collage to see it bigger)


Saturday, September 20, 2008

Jamie's Saturday Steal Giveaway #3!!!!

Alrighty friends. Be sure to check out Jamie's new giveaway HERE. She has more darling handmade accessories. While you're there, check out her new Etsy store.

Friday, September 19, 2008

Triple Criss-Cross


~~~~~~~(Click images to see larger)~~~~~~~

I almost named this post Triple X or XXX, but reconsidered after realizing the crowd that might inadvertently end up on our innocent blog via a google search. LOL So we'll call it triple criss-cross unless someone else already has a different name for it. I've been working on this "do" since I did the "x-braids" last week. I just wasn't sure what I wanted to do with the back. And since I really like low ponies in my daughter's hair, we just ended them by crossing the back braids into ponies. The braids actually cross 5 times by the end but you mainly see the three big ones. If you wanted to divide the back of the head into another 4 quadrants on either side, then you could easily keep going and do another set of x's.

Here's what I did...

First, wet hair down (very wet) because as braids dry it makes them tighter so that they'll stay in very well all day. Then divide the front section into 8 sections (4 quadrants on either side).
Then just start french braiding the first cross on one side like you did with the "x-braids" from last week. You can either keep braiding to the end or clippy it to the side of the head while you get the next braid ready.
Cross the other side over.
Braid down as far as you can (probably even more than I did in these pictures) and then elastic them off while you move to the other side of the head. Once both sides have their criss-cross braids in and are banded, make sure you have a good part in the back (zig-zag or straight or whatever you want). With this bunch of hair you can do anything you want--messy buns, braids, ponies, curls, you-name-it.
I did simple ponies, but I crossed the braids from either side before fastening the ponies up (you'll remove the braids elastics, too).
And this is when I realized that she wasn't wearing what she was supposed to be wearing today. Dumb mommy. So I carefully removed her shirt and put her outfit on before finishing off the braids with ribbon. I also added these little sunflower buttons by looping a bobby pin through the back of the buttons and sliding the bobby pins into her hair. Voila!


Full-sized "grandparent photos" for printing can be found by clicking HERE (and I must say I'll miss taking all of these beautiful outdoor shots one the snow rolls in). Here's a tiny embedded slideshow that I'll take down in a few days:

Thursday, September 18, 2008

Simple Lacing into Two Braids


I'm kinda late posting today--even considered not posting this experiment. But, alas, here we are. Today we're just testing out lacing with different types of new ribbons. We ended up with 6 laced "puffy braids" (3 on each side) and braided them on down the back of the head. It was pretty simple, but still a good learning experience. I think we'll use smaller ribbon for the lacing next time. However, the bigger ribbon works well for the braids.

Here are a couple shots from the front. In real life it didn't look that crooked in the front, but I noticed it really does here. I'll have to watch that next time. LOL


And now, a couple shots for our LONG-distance family (primarily, adoring grandparents).


Wednesday, September 17, 2008

Banana Snakes


This "snake" do is in the shape of the old 80's banana clips. I have seen others doing a snake updo out of one pony tail (for example, check Babes in Hairland's HERE and Jenn of Girly Do's HERE), but I was concerned that, due to the thickness of my daughter's hair, one bun would end up WAY too big and eventually fall down. So I stretched the typical snake bun across her head from front to back.

Here's what to do:

ONE......TWO......THREE ponies (80's banana clip style)

With your ponies up, now just start at the top and...

TWIST, TWIST, TWIST
(and bobby pin the ends down as hidden as possible--I did the bobby pin ribbons like Jenn suggested)


If you want to stop when you hit the bottom pony and leave it down, I think that might look nice, too. Or you can finish off the last pony and have it all up off the neck.


And here's our final "do." Enjoy! And let me know if you try this and how it worked out!


Tuesday, September 16, 2008

Hey Mom...
Boys Have Manes, Too!


Some days a girl just has to let her hair down. So guess who stepped up to the plate?! This little munchkin plopped right down in the "hair" chair and began chanting, "Me! Me! Me!" And I hafta tell ya, he certainly enjoyed getting his "do" like big sister. It took lots of gel and some fun head massaging. There's nothing like getting some good mommy time in.

Now, you've got to believe me. He totally posed for the picture below. He's not some poor, neglected, misunderstood child at ALL. It's just that his time in the "hair chair" is unfortunately over. :( That's our little cutie patooty!


Monday, September 15, 2008

Pay it Forward Hair Stuff Giveaway


Hey all, we have a new "girl hair" blogger on the block, but she certainly isn't new to doing hair. You don't want to miss this one--she has FIVE (yes that's 5) little girls all blessed with long, thick manes. WOWEE! She spends roughly 2 hours a day fixing their hair. Oh, and her new blog is called Hair's Our Life and I'll add it to my sidebar bloglist, as well. I'm really looking forward to keeping up with her!

She's also doing a pay it forward giveaway, so be sure to visit her give away HERE.

Sunday, September 14, 2008

The X-Braids


Let me know if there's a legitimate name for these. I've never seen them done before so I'll at least pretend they're original for the time being ('cause I know it's really not). I'm sure most everything we do has been around for thousands of years, actually.

UPDATE: Okay, thanks to Amy (in comments) I went searching and did, indeed, find it elsewhere. So if you wanna check out how someone else did it look HERE and HERE. I guess we all figure these things out on our own eventually. LOL

First I divided her hair into four quadrants. Make sure to wet the hair down thoroughly for neatness.

Next, I undid two diagnal sections because I will braid from one side and end on the other side. I did 2 or 3 links of regular braid in the cross-over section and then started adding in hair from the new section to french braid on down.


Here's what it looks like with one braid finished.

Now I took down the other two sections and braided from the left front section down to the right back section. See below:


Add whatever embellishments (flowers, clips, ribbons, etc.) and if you want to braid in ribbon, be sure to start at the beginning with it.